Menu
Boiling okra is a simple yet nutritious dish that’s easy to prepare at home. To achieve perfectly boiled okra that’s bright green, not slimy, and retains its natural sweetness, you need to master the right technique. Let’s dive into the details in this article!
Choosing Fresh Okra for Boiling
Selecting high-quality okra plays a crucial role in determining the flavor of your dish. Here are the characteristics to look for in fresh, young okra:
- Shape: Okra should be of medium size, with a slender and straight body.
- Color: The skin should be a vibrant, glossy green, with soft, fine hairs and no dark spots or blemishes.
- Texture: When gently squeezed, young okra should feel slightly springy and soft but not overly firm. You can also try snapping the tip; young tips will break easily, while mature ones tend to be tough and cling to the body.
- Avoid Mature Okra: Okra that is dark green, large in size, or has dark marks is usually a sign that it’s mature. When boiled, it will become tough, slimy, and less tasty.
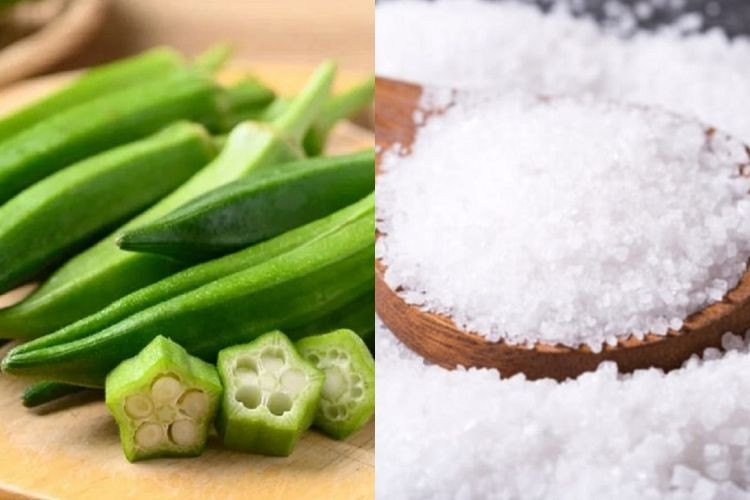
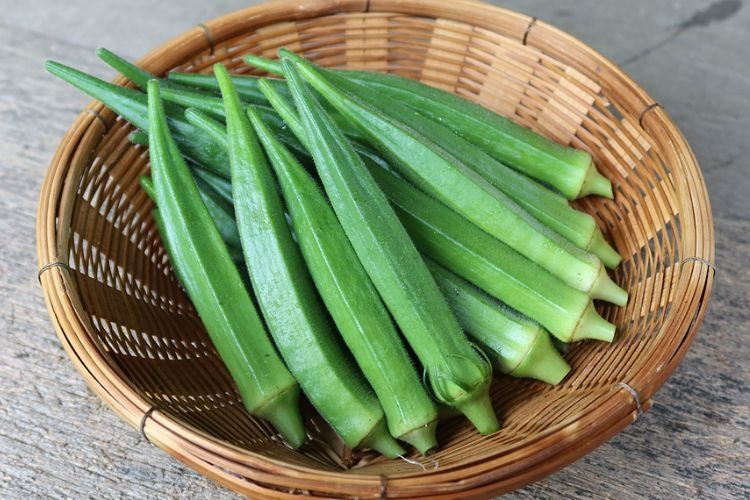 Choosing fresh okra with a bright green color and no blemishes
Additionally, to ensure food safety, buy okra from reputable stores or trusted suppliers.
Guide to Boiling Okra Perfectly
Preparing Ingredients
To make boiled okra for three people, you’ll need the following ingredients:
- 300 grams of fresh, young okra.
- A pinch of salt.
 Ingredients needed to boil okra
Steps to Follow
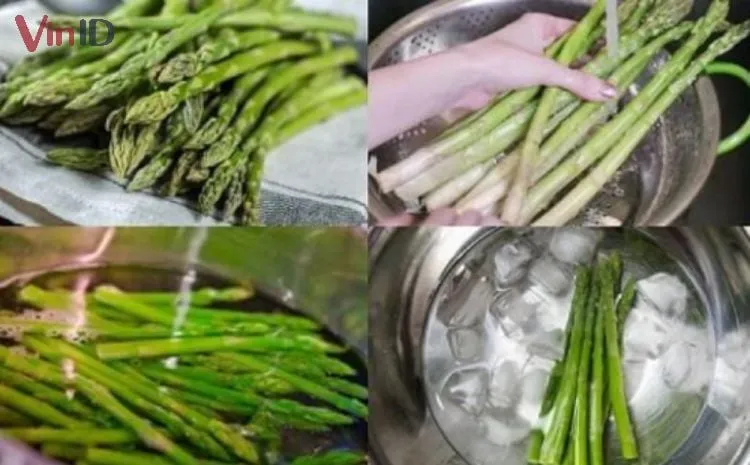
Step 1: Preparing Okra
After purchasing, use a knife to trim off the ends (stem and tip) of the okra. Then, soak the okra in a basin of lightly salted water for about 5 minutes. After this time, remove the okra, rinse with clean water, and let it drain.
Soaking okra in lightly salted water not only helps remove impurities but also reduces sliminess when boiled, making the dish more appealing.
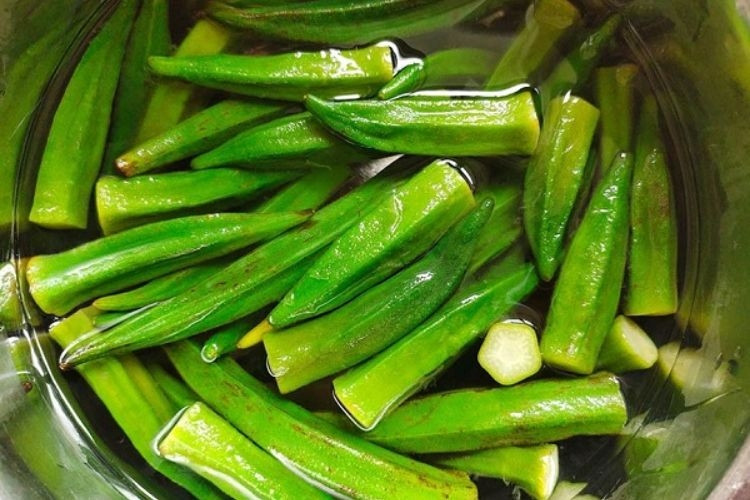 Soaking okra in lightly salted water to reduce sliminess
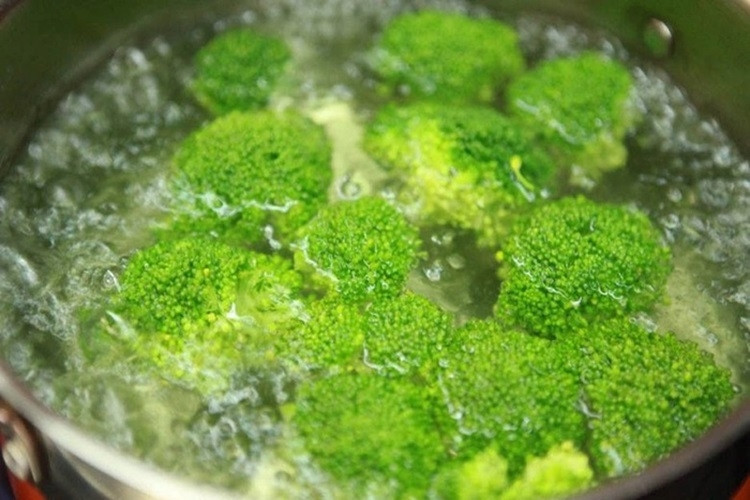
Step 2: Boiling Okra
Bring a pot of water to a boil on the stove. Once the water is vigorously boiling, add a teaspoon of salt. Then, add the prepped okra to the pot and boil for 3 minutes, without covering the pot. After 3 minutes, turn off the heat and remove the okra to a colander.
Be careful not to overcook the okra, as this will make it mushy, change its color from green to yellow, and increase sliminess. Adding salt to the boiling water not only helps keep the okra bright green but also works well for most other vegetables.
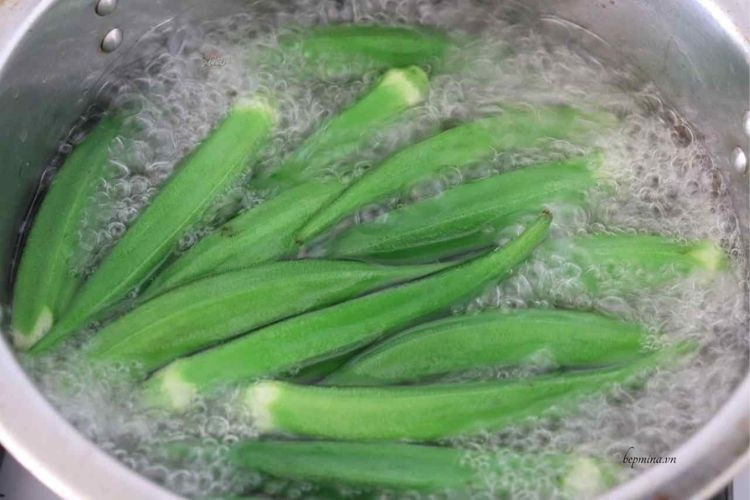 Boiling okra in boiling water to maintain its bright green color
Final Product
The end result is a plate of bright green, tender, and non-slimy boiled okra. You can enjoy it directly or pair it with special dipping sauces for boiled vegetables. Particularly, boiled okra pairs wonderfully with savory, spicy braised dishes.
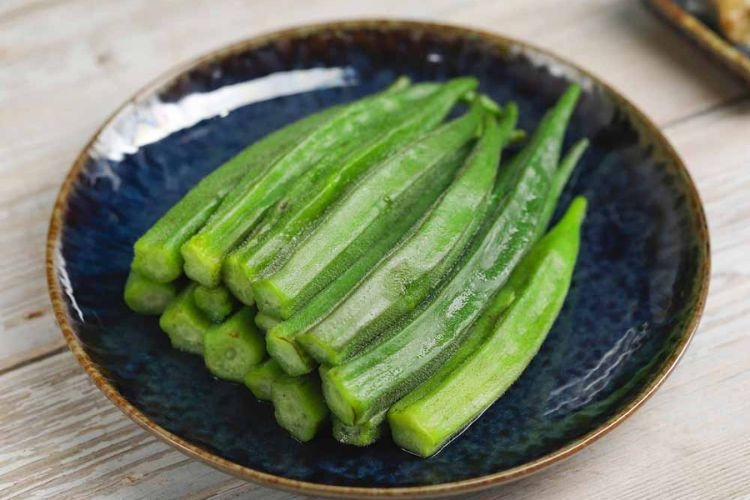 Finished product of bright green, non-slimy boiled okra
Suitable Dipping Sauces for Boiled Okra
Whether it’s fish sauce, soy sauce, or chili sauce, boiled okra can pair perfectly with any of them. However, the following dipping sauce recipe will offer a unique flavor:
- Mix 2 tablespoons of ground chili and garlic in a bowl, add 1 tablespoon of soy sauce, and stir well.
- Heat a non-stick pan on the stove, bring 4 tablespoons of cooking oil to a boil, then pour in the mixture from above, stirring for 2-3 minutes before turning off the heat.
You can drizzle the sauce directly over the boiled okra or dip each piece into the prepared sauce.
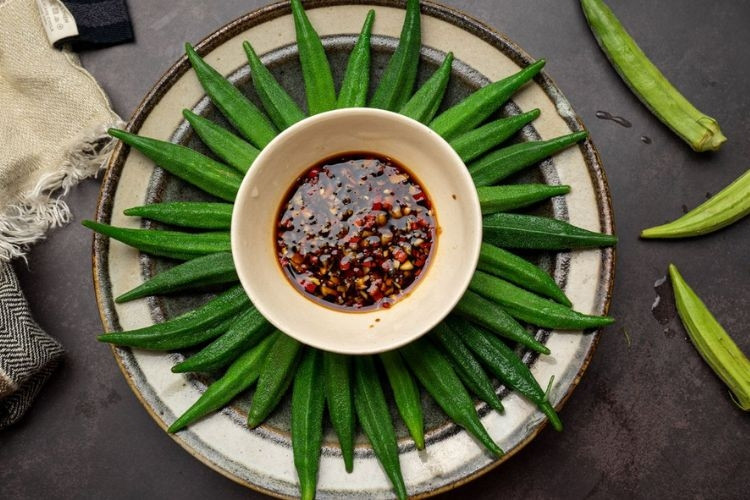 Delicious dipping sauce recipe for boiled okra
Conclusion
In summary, boiling okra is not only simple but also helps retain many valuable nutrients. With the detailed instructions above, we hope you can successfully prepare bright green, crunchy, and nutritious boiled okra. Give it a try today to add variety to your family meals!
See Also:
Thông báo chính thức: Sổ Tay Món Ăn không hợp tác với bất kỳ ai để bán công thức món ăn và cũng không bán ở bất kỳ kênh nào, chúng tôi tổng hợp và chia sẻ công thức nấu ăn miễn phí.
Xin cám ơn!